Sales Engineers
- FMA
- The Fabricator
- FABTECH
- Canadian Metalworking
Categories
- Additive Manufacturing
- Aluminum Welding
- Arc Welding
- Assembly and Joining
- Automation and Robotics
- Bending and Forming
- Consumables
- Cutting and Weld Prep
- Electric Vehicles
- En Español
- Finishing
- Hydroforming
- Laser Cutting
- Laser Welding
- Machining
- Manufacturing Software
- Materials Handling
- Metals/Materials
- Oxyfuel Cutting
- Plasma Cutting
- Power Tools
- Punching and Other Holemaking
- Roll Forming
- Safety
- Sawing
- Shearing
- Shop Management
- Testing and Measuring
- Tube and Pipe Fabrication
- Tube and Pipe Production
- Waterjet Cutting
Industry Directory
Webcasts
Podcasts
FAB 40
Advertise
Subscribe
Account Login
Search
Where is your press brake tooling?
Solid organization provides the foundation for improvement in bending
- By Jeff Middlebrooks, John Waller, and Steve Brown
- October 30, 2014
- Article
- Bending and Forming
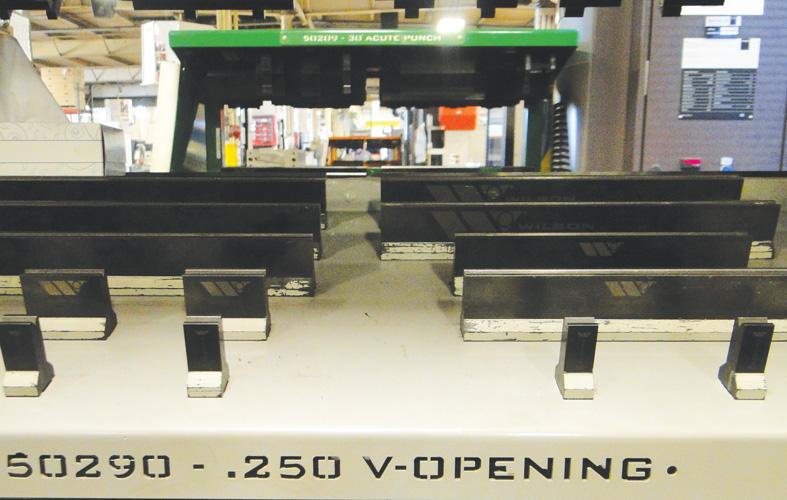
Figure 1
This rack makes tool storage locations clear even for the newest hire. Photo courtesy of DeWys Mfg. Inc.
If you perform a time study of a typical press brake operation, you’ll probably uncover a significant amount of time between the last good part of the previous job and the first good part of the next job. Operators may spend a good portion of that downtime away from the machine, searching for the material and tools they need. In lean manufacturing, that’s a classic waste.
By situating everything in a common-sense fashion, you reduce non-value-added activity (see Figure 1). Customers aren’t paying operators to comb through a box or rack of tools. They’re paying for good parts. If operators are bending more parts in less time, the cost per part goes down, and the return on investment for your bending equipment is faster.
It boils down to this: Organized workstation = Productive operator = Greater throughput = Lower cost per part = Increased profitability.
The Right Culture
A lot of decisions behind tool organization depend on the operation and job mix. For instance, how far in advance do operators know what they will be running? This may affect how and where tooling is stored. Does your operation use conventional or precision-ground tooling? What are operators’ personal preferences? What works for one technician may not work for someone else.
But some steps to good organization are universal. Laying unlabeled tools haphazardly in boxes or stacked on top of one another isn’t good practice, no matter the situation (see Figure 2). As with so much in continuous improvement, tool organization requires the right culture. Operators who take ownership over their areas are the most productive.
This sense of ownership applies to everyone in the organization, from top managers to the shop floor. Employees can attend a lean seminar off-site and leave with a positive, gung-ho, can-do attitude. They start the lean transformation with good intentions but lose steam once they get back into their daily work at the shop. Everyone needs to be invested in lean for it to be sustainable.
Say an operator has a drawer full of tools. It’s a mess, but he knows where everything is; then someone comes along and says, “You need to organize it this way.” There is, of course, resistance to that. Some shops have run the same way for years, and operators grow accustomed to working in a disorganized place.
Changing shop culture isn’t easy. It takes time and persistence. But as a starting point, a lean culture requires the right incentives. For instance, are employees paid by the hour or by the part? Paying by the part does work in many situations, but it can present hurdles.
Say you try to implement a continuous improvement program in which operators are told to organize their work area. From a big-picture perspective, they really should stop and spend time to organize their workstation. It will make their jobs easier and changeovers shorter. But, initially, turning a mess into an organized workstation takes time, and under the current incentive structure, it’s not paid time.
To overcome this conundrum, one shop instituted an incentive structure that helped set the stage for change. The company still paid per part, but it also paid per hour during setup times. Being paid per part incentivized operators to be as productive as possible, but they also got paid for setups and organizing their workspace.
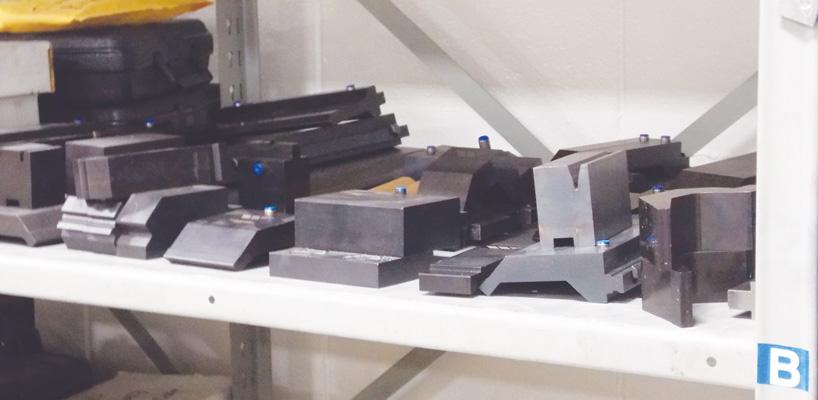
Figure 2
Stacking unlabeled tools on top of each other just isn’t good practice, no matter the situation. Photo courtesy of Wilson Tool International®.
Layout Strategy
Shop layout should reflect common sense. Try to focus everything on the press brake. All paths the operator walks from the storage area to the machine should be kept short and sweet to minimize operator steps and fatigue. When possible, always try storing tools at the point of use. Having a tooling rack in a back room, away from the brake area, fosters a lot of wasted movement.
For some shops, this might mean putting a storage unit equidistant to several brakes, or it might mean situating a cabinet next to each brake. Mobile tooling carts can help, too, especially for job shops that process various parts every day. Some carts may carry specific tool types used for certain product types or families, and material handlers or operators can move those carts into position when needed for the changeover. Whichever way you do it, make sure operators can access the tools without a lot of unnecessary movement.
Open and Closed Racks
Some prefer open-air storage racks because operators can identify the tools they need immediately without opening a drawer. The racks should have clear labels so operators know immediately where the tooling belongs (see Figure 3). People aren’t perfect; they misplace tools now and then. But with the right racking system, with obvious visual cues, technicians can find the tool before it becomes a problem during a job changeover. The last thing you want is an operator hunting for the right tool while his or her press brake sits idle.
However, tools left in open-air storage units can collect shop debris and dust, which can affect the tool’s bending surface. To avoid this, be sure to clean dust and debris from the tooling regularly. Open-air storage racks, especially ones made of sheet metal, can damage tooling over time, as punches and dies are removed and returned. Never rest the punch tip on the sheet metal, and, of course, never simply throw a tool down on the rack; both practices can cause premature tool wear.
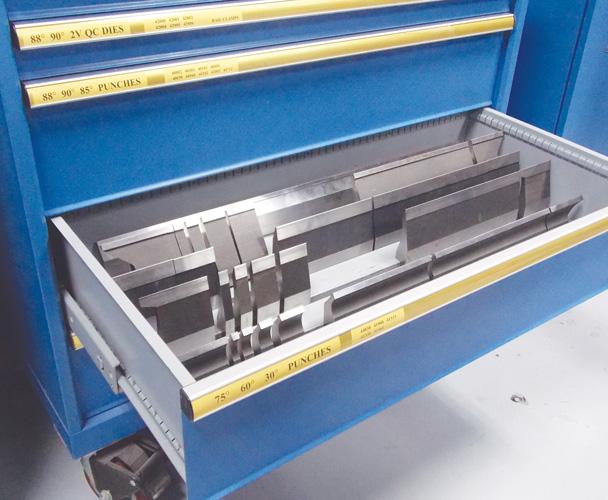
Closed storage cabinets keep your tooling free of shop dust, and their interiors are often made out of material that doesn’t wear tools. You need to affix labels on the outside and inside of the drawer, where every tool has its place. When operators pull a drawer open and see an empty space, they should be able to see the label and know exactly which tool should be there (see Figure 4).
Tool Identification
Be sure tool labels have enough information not only for veterans but also rookies. If a shop has years’ worth of tooling that’s been inconsistently labeled, or not labeled at all, such standardization can take time, but the effort will pay off in the end.
For those who prefer to have a visual of the tool rather than words or numbers, you can use a sticker of the tool profile. But whether you use words, images, or both to identify tooling really doesn’t matter. What does matter is consistency. The labeling method should be the same on the tool, the setup sheet, the shop software—everywhere. Every employee should be able to read the label and know what it means. Clear labeling—on tool racks, cabinets, and on the tools themselves—not only makes bending operations more efficient, but it also makes the training of new hires a lot easier.
You also may want to try color coding (see Figure 5). This can be especially effective if multiple languages are spoken in the shop. On the other hand, you need to make sure people aren’t color-blind. Using a color coded-based system isn’t as universal as you might think.
Some tooling identification marks are laser-etched onto the punch and die themselves (see Figure 6). Other shops simply use labels or markers. Whatever the method, make sure the label identifies the tool’s important characteristics. Punch labels should show the tip radius, angle, tonnage, and length; die labels should include the V opening and angle, in addition to the tonnage and the length.
Some storage units allow tools to hang from the top of the shelf, other units allow for tools to be stored tip-up, and both are great for protecting tools from damage. But the way tools are situated matters, because their orientation may obscure their label. All pertinent information about the tool should be immediately visible to the person looking at the tool in the drawer or on the rack (see Figure 7).
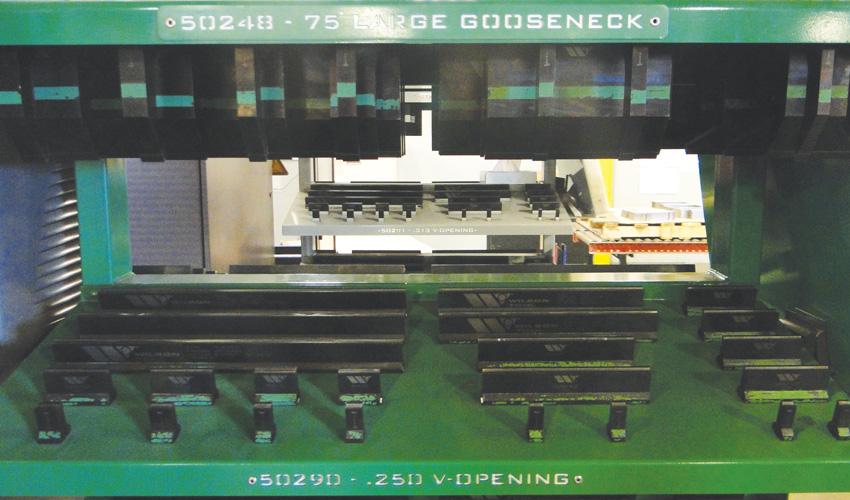
Figure 3
Open racks with clear labels show operators exactly where
tools belong. Photo courtesy of DeWys Mfg. Inc.
Dedicated Tooling
Some shops might have all the right tooling, but they don’t have enough of it, so technicians need to share. No matter how organized your tools are, if an operator needs a tool that’s in use, he still needs to wait to finish the job. Sure, he can jump to another job on the schedule, but he may be making unneeded work-in-process, and this can snowball into larger problems downstream.
Investing in dedicated tools for specific machines can make a lot of sense. It simplifies tool organization and ensures that an operator always has the tools he needs.
Shadow Boards
This is another must-have. Shadow boards help operators find secondary, or peripheral, tools they need to measure parts and load/unload the punches and dies during changeover. Make sure each brake has dedicated peripheral tools; operators shouldn’t have to wait to use something as simple as an Allen wrench (see Figure 8).
When designing these boards, pay attention to the operators’ needs. How often do they use this wrench or that caliper? Ideally, operators should spend no time searching for what they need.
Organization Pays Off
The organizational concepts behind lean are easy to apply; the common struggle is that it’s hard to break bad habits. But, ultimately, tool organization will improve profits, increase your competitive edge, and provide the foundation for 5S in lean manufacturing. Even if you don’t want to call it “lean,” you will earn more money and be more competitive. Whatever you call it, you’re going to become more productive.
About the Authors
Jeff Middlebrooks
12912 Farnham Ave.
White Bear Lake, MN 55110
866-752-6531
John Waller
Sales Engineers
12912 Farnham Ave.
White Bear Lake, MN 55110
866-752-6531
Steve Brown
Bending Product Manager
12912 Farnham Ave.
White Bear Lake, MN 55110
866-752-6531
Related Companies
subscribe now

The Fabricator is North America's leading magazine for the metal forming and fabricating industry. The magazine delivers the news, technical articles, and case histories that enable fabricators to do their jobs more efficiently. The Fabricator has served the industry since 1970.
start your free subscription- Stay connected from anywhere

Easily access valuable industry resources now with full access to the digital edition of The Fabricator.

Easily access valuable industry resources now with full access to the digital edition of The Welder.

Easily access valuable industry resources now with full access to the digital edition of The Tube and Pipe Journal.
- Podcasting
- Podcast:
- The Fabricator Podcast
- Published:
- 04/16/2024
- Running Time:
- 63:29
In this episode of The Fabricator Podcast, Caleb Chamberlain, co-founder and CEO of OSH Cut, discusses his company’s...
- Industry Events
16th Annual Safety Conference
- April 30 - May 1, 2024
- Elgin,
Pipe and Tube Conference
- May 21 - 22, 2024
- Omaha, NE
World-Class Roll Forming Workshop
- June 5 - 6, 2024
- Louisville, KY
Advanced Laser Application Workshop
- June 25 - 27, 2024
- Novi, MI


